Managing 911 and Call Features

The necessary steps to specify your location for emergency services as well as managing call features.
VoIP administration is found by logging into My Account with your email and password:

Managing Your 911 Address

Use the “Manage 911 Address Profiles” link when you log into My Account to specify your physical location. Please read and understand the contained terms of this service as detailed in this section.

911 works differently through VoIP

It is important to keep your address updated at all times. MCSnet Phone is not tied to your physical location, so you must specify your physical location to provide this information to emergency services. VoIP 911 calling is different from traditional 911 calling because your location is not derived automatically through your phone number.

A VoIP 911 call is dispatched through a national emergency call centre first, where it is directed to the nearest response centre after confirming your physical address. Emergency response will be sent to the address that you specify in the “Manage 911 Address Profiles” section if you are not able to speak during the call. The VoIP 911 service will not work if the VoIP or associated internet service is not connected.

In the event of a power outage, your internet and phone service will be offline due to power loss, so 911 service will not be available.

If you have to call 911, please be prepared to confirm your location and call back number with the operator and to stay on the line or call back if the call is disconnected.

How to Update the 911 Profile in My Account

Follow these steps to ensure your emergency contact information is current:
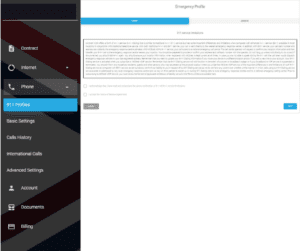
  1. Access Advanced Settings: Log in to your MCSnet My Account and navigate to the Advanced Settings section.
  2. Select Phone: From the settings menu, locate and click on the Phone tab to manage your VoIP services.
  3. Select 911 Profile: Click on the option for 911 Profile or “Manage 911 Address Profile”.
  4. Review and Accept Terms: Carefully review the specific limitations of VoIP 911 service. You must click all required acknowledgment checkboxes and then select Continue or Accept to proceed.
  5. Choose Urban or Rural Address: Select your address type to complete the setup.

⚠️ Important Tip: Please be absolutely sure of your address type (Urban or Rural) before clicking. If you select the wrong option, you will have to navigate back to the main menu and start the entire 911 Profile setup process again to correct it.

Urban: Select this if you have a standard street address. Most information should be automatically populated.

Rural: Select this for locations using municipal addressing or quarter sections. You will need to manually enter your municipal address or house number under the additional information fields.

Recommendation: We strongly advise that you always keep a secondary means of contacting emergency services, such as a charged mobile phone. Ensure all household residents are aware that 911 calling will not work if the power or internet is down.

Long Distance and International Call Allowance

Long distance calls to Canada and the United States are free, with the exception of the Canadian territories, Alaska, and Hawaii.

To make an international call or calls to the territories, Alaska, or Hawaii, you must allocate funds to this allowance. This can be done through your My Account.

To find out the per-minute cost to these destinations, please enter the phone number in the rate calculator

Voicemail Settings

Set your VoIP voicemail password and other options as shown in the picture below.

After filling in the appropriate options, click continue to save the settings. The settings will save and the voicemail password will blank out when you click continue.

Voicemail Options

  • Enable your voicemail in this area where you will also initiate a password and set the time before the voicemail will answer the call.
  • Voicemail can be retrieved by dialing * 98 on your phone and following the prompts. Remote checking of voice mail can be performed by calling your number and dialing * when the voice message starts, and then following the prompts.

Call Forwarding

  • Call forwarding will redirect incoming calls to the specified phone number.
  • Call Forward Busy will only redirect the calls if the line is in use. Call Forward – No Answer will only redirect the calls if the call is not answered within the time specified in the voicemail answer time, but instead of going to voicemail will send the call to the specified phone number.
  • Network unavailable forwarding is also available to redirect incoming calls in the instance that the Internet becomes unavailable to your phone adapter.